“Choosing the Right Tools for DIY Wall Painting”:
Choosing the Right Tools for DIY Wall Painting
Painting your home is one of the most effective ways to transform a space—but choosing the right tools for DIY wall painting is what separates a clean, professional finish from a messy result. This guide will walk you through everything you need to know about choosing the right tools for DIY wall painting, ensuring your project runs smoothly from start to finish. While color selection is crucial, one of the most overlooked yet critical aspects of a successful DIY wall painting project is choosing the right tools. Using appropriate tools not only makes the task easier but also ensures a professional-looking finish.
In this guide, we’ll walk you through the essential tools for DIY wall painting and how to choose the right ones for your project.
1. Preparation Tools
Before applying paint, proper surface preparation is key. These tools help you prep the walls for a smooth and lasting finish.Before you begin painting, choosing the right tools for DIY wall painting helps you prepare the surface more effectively and saves time. When choosing the right tools for DIY wall painting, your first step should always be surface preparation. Clean walls, repaired imperfections, and protected floors all depend on using the correct materials.
a. Drop Cloths and Plastic Sheeting
To protect your floors, furniture, and fixtures from paint splatters, you’ll need drop cloths. Canvas drop cloths are durable and reusable, ideal for covering floors. For furniture or small items, lightweight plastic sheeting works well.
b. Painter’s Tape
Painter’s tape is used to mask off areas where you don’t want paint—such as trim, baseboards, and windows. Choose high-quality painter’s tape that peels off easily and doesn’t leave residue or pull up the underlying paint.
c. Sandpaper and Sanding Block
To create a smooth surface, sanding is necessary, especially if the wall has patches or previous paint drips. Medium (120-grit) and fine (220-grit) sandpapers are typically sufficient. Use a sanding block for even pressure and better control.
d. Putty Knife and Wall Filler
Any holes or cracks should be filled before painting. Use a putty knife to apply wall filler or spackling paste, then sand the area smooth once dry.
e. Cleaning Supplies
Dust, grease, and grime can affect how paint adheres to the wall. Use a damp cloth, mild detergent, or a solution of trisodium phosphate (TSP) to clean the surfaces beforehand.
2. Application Tools
Choosing the right painting tools depends on the type of surface, size of the area, and the finish you desire.One of the most important parts of DIY wall painting is selecting brushes and rollers that match your surface type and paint finish.
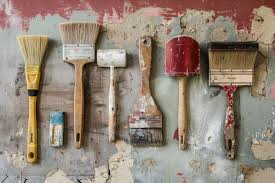
a. Paintbrushes
Brushes are essential for cutting in edges and painting corners or trim. When choosing a paintbrush, consider:
-
Bristle type: Synthetic bristles are best for water-based (latex) paints. Natural bristles are ideal for oil-based paints.
-
Size: A 1- to 2-inch angled sash brush is perfect for precision work along edges and corners.
-
Quality: Higher-quality brushes may cost more but provide smoother application and last longer with proper care.
b. Paint Rollers
Rollers are ideal for covering large wall surfaces quickly and efficiently. Choose rollers based on:
-
Nap length: Short nap (1/4″ to 3/8″) for smooth walls, medium nap (1/2″) for lightly textured surfaces, and long nap (3/4″ or more) for rough walls like stucco.
-
Roller width: Standard 9-inch rollers work for most walls, while mini rollers (4-inch or 6-inch) are useful for tight spaces or furniture painting.
-
Material: Foam rollers are great for very smooth finishes but may not hold as much paint. Woven or knit rollers provide better coverage and are suitable for most walls.
c. Paint Trays and Liners
A sturdy paint tray makes loading your roller easier. Use disposable tray liners for easy cleanup. For large projects, consider a paint grid in a bucket to reduce mess and hold more paint.
d. Extension Poles
For high walls or ceilings, an extension pole allows you to paint without needing a ladder constantly. Look for telescoping poles that fit securely into your roller handle and are lightweight for easier handling.A lot of beginners struggle with paint marks or uneven finishes simply because they skipped the step of choosing the right tools for DIY wall painting. Using the right roller or brush can dramatically improve the outcome.
3. Specialty Tools
Depending on your design plans, you may need some additional tools.
a. Edging Tools
If you’re not comfortable cutting in with a brush, an edging tool can help create clean lines where the wall meets the ceiling or trim. These are especially useful for beginners.
b. Paint Sprayers
For a super-smooth finish or very large areas, a paint sprayer may be a worthwhile investment or rental. However, they require practice and proper masking of the area to avoid overspray.
c. Paint Mixer
Consistent paint color and texture require proper mixing. A paint mixer attachment for a drill ensures your paint is thoroughly mixed, especially if it’s been sitting for a while.
4. Safety and Clean-up Tools
Painting can get messy, and ensuring your safety and a clean finish is just as important.
a. Gloves and Safety Goggles
Protect your hands from paint and solvents with rubber or nitrile gloves. Safety goggles are a must when sanding or using a paint sprayer.
b. Ladder or Step Stool
To reach high places safely, a sturdy ladder or step stool is necessary. Avoid overreaching, which can lead to accidents or uneven application.
c. Rags and Sponges
Keep rags and sponges handy for wiping drips, cleaning tools, or correcting mistakes while the paint is still wet.
d. Paint Can Opener and Pour Spout
A dedicated paint can opener prevents damage to the lid. A pour spout makes it easier to transfer paint into trays without spills.
5. Choosing Quality Over Quantity
While it might be tempting to buy the cheapest tools available, investing in better-quality brushes, rollers, and tape pays off in the final result. Poor-quality tools can lead to uneven paint, shed bristles, or poor coverage—causing frustration and requiring extra work. Many beginners make the mistake of using cheap tools, but choosing the right tools for DIY wall painting ensures better coverage and fewer frustrations.
6. Organizing Your Tools
Before starting, organize your painting tools in a single container or tool caddy. This helps you keep track of everything and reduces downtime looking for misplaced items. Label your tools if needed, especially if you’re sharing them with others.
7. Environmentally Friendly Choices
Consider eco-friendly options like biodegradable drop cloths, low-VOC paints, and recyclable or reusable tools. Cleaning water-based paint brushes with water and avoiding excessive waste helps minimize your environmental impact.
Final Thoughts
DIY wall painting is an empowering and enjoyable project when done right. The key to success isn’t just choosing the right color—it’s also about using the right tools. From preparation to application and cleanup, having the correct equipment ensures a smoother process, a cleaner result, and a more professional appearance. Whether you’re a first-timer or a seasoned DIYer, taking time to understand and invest in the right painting tools can make all the difference.
So, before you dip your brush or roller into that beautiful new paint color, take a moment to assemble your painting toolkit. With the right tools in hand, you’re well on your way to transforming your space with confidence and style.
-
“Right tools for DIY wall painting”
-
“Essential tools for wall painting”
-
“Best tools for painting walls at home”
-
“Tools you need for successful DIY wall painting”
For Expert Advise click here to Get in touch with us